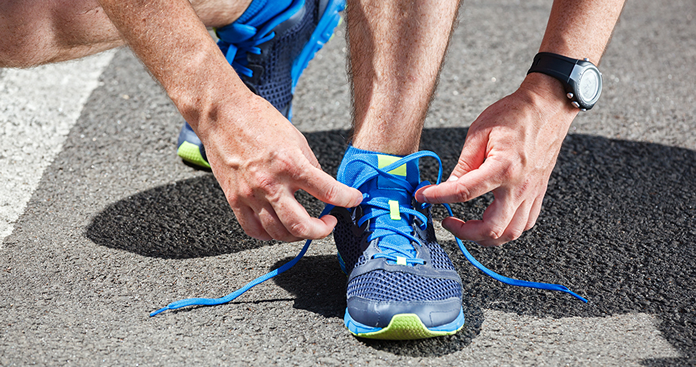
With this years London Marathon just over a week away now, I have seen a flurry of anxious runners in the clinic looking to rid any last niggles that could upset the big day.
The majority of runners that I treat tend to be detailed orientated in their approach to training, leaving nothing to chance; tracking milage, heart rate, cadence even carefully selecting clothing and footwear – sound familiar?
But one aspect often over looked by many runners is how you tie your laces – Yes there’s more than one way to tie your laces!
Despite being a simple task that most of us learnt to do at school, lacing your running shoes is actually a science. A 2008 study at the University of Duisberg Germany found that the tightness and pattern of how runners laced up their running shoes directly affected impact force and pronation. This can also have a significant impact when staying injury-free whilst racking up the miles.
So, whether you’re managing an ITB issue, plantar fasciitis or fending off the dreaded black toenails; Try one of these 5 simple lacing techniques next time you run and avoid tripping up with your marathon preparation!
Wide Foot
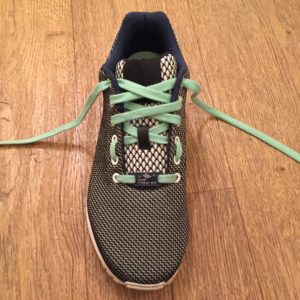
When running pressure is put through your toes and forefoot. This wide lacing technique allows the toes and forefoot space to splay out whilst running, reducing pressure through the ball of the foot and helping with foot issues such as metatarsalgia and morton’s neuroma.
How to do it: Starting from the toe of your shoe, lace through the eyelets up the side of your shoe until you get to the middle. From here cross the laces over until you get to the top of the shoe and tie.
Narrow Foot
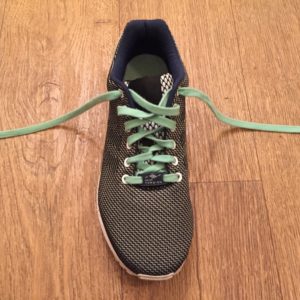
One contributing factor to some of the running injuries that I see affecting the ankle and knee is instability in the foot and arch. This narrow lacing technique provides a more snug fit across the middle of the foot, thus providing more support and stability.
How to do it: Cross the laces up to the middle of the shoe and add a loop by pushing the lace through the eyelet on the same side that it has come through. From there lace the opposite side through the created loop, forming a link and continue to cross the laces over to the top and tie.
Slipping Heel

Common running issues such as blisters and sores around the foot can be easily avoided by ensuring that there is no excess movement of the shoe during your run. This technique uses a ‘loop lock’ technique at the top of the shoe to provide a tight fit around the ankle and avoid unwanted slipping.
How to do it: Cross the laces towards the top of the shoe. Thread the laces back through the top eyelet on the same side to create a loop. From there take the end of the laces and thread through the opposite loop previously created and pull tight.
High Arch
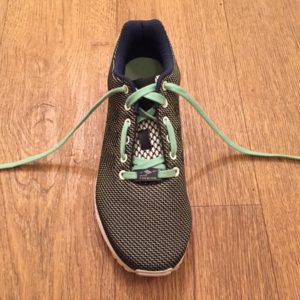
This technique loosens up the shoe across the mid-foot taking pressure off the arch of your foot. This is particular good for runners who suffer from arch pain and plantar fasciitis.
How to do it: Start by crossing the laces over as normal at the toe of the shoe then continue by threading the laces up the same side, missing out an eyelet through the middle of the shoe. Continue to cross the laces over to the top and tie.
Toenail Issues
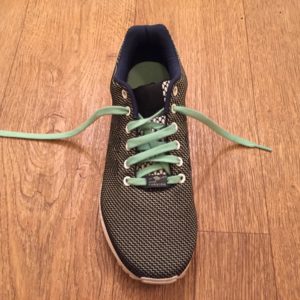
Many of the toe and toenail conditions I see in runners can be traced to compression in the toe compartment of the shoe. This lacing technique tightens the shoe around your big toe, keeping pressure away from the toenail. This lacing technique is perfect if you suffer from black toenail, toe blisters, bleeding toes, corns or hammer toes.
How to do it: Take the lace on the side of the big toe and thread it directly through the highest opposite eyelet. With the remaining lace, continue to lace diagonally up the shoe until you reach the top then tie.
Quick tip: Any changes to your running are best done on your practice runs and not on the day of the race itself – this way any tweaks can be quickly adjusted prior without affecting your time or performance during the big day.
